
The login name and password for your connection is the same as your unique BMB Department network credentials (used for network shares, etc).
Please note that Enterprise Authentication used with BMB WiFi, Eduroam, and WUSM-Secure will not work properly with Windows XP unless you use a password on your computer account.
Need assistance? Just submit a ticket!
|
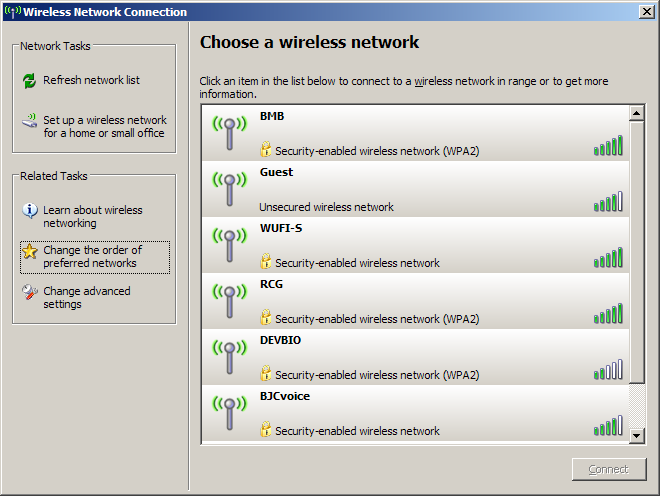
* Double-click the WiFi indicator in your System tray.
It looks like a single computer monitor with some waves coming from it. |

|
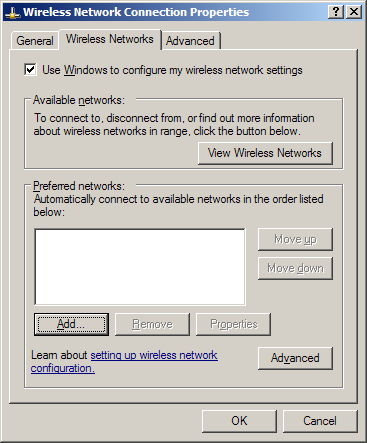
| * Click Change the order of preferred networks. |
|
| * Click the Add button. |
|
|
* For Network name (SSID), type in BMB.
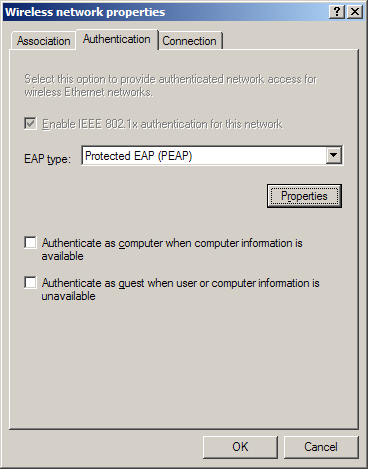
* For Network Authentication, select WPA2. * For Data Encryption, select AES. * Click the Authentication tab. |

|
|
* Change EAP type to PEAP from the drop-down list.
* Uncheck Authenticate as computer when computer information is available. * Click the Properties button. |
|
|
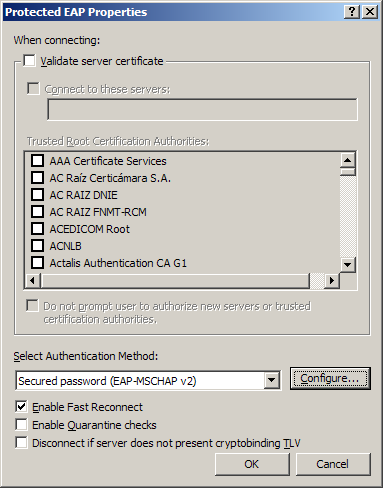
* Uncheck “Validate server certificate”.
* Click the Configure… button. |
|
|
* Uncheck “Automatically use my Windows logon name and password”.
* Click the OK button. |

|
| * Click OK to close the Protected EAP Properties page. |
|
| * Click OK to close the Windows network properties page. |
|
|
If you have multiple wireless networks saved, you can change their connection order here.
* Click OK to close the Wireless Network Connection Properties page. |

|
| * Upon the first connection attempt, Windows should prompt you for connection credentials. Click the popup balloon. |

|
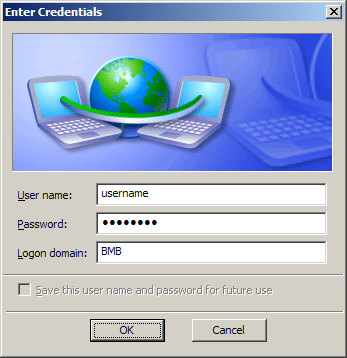
| * Enter your BMB username, password, and the “BMB” domain name. |
|
| You should now be connected to BMB! |

|